
Key Takeaways
- Leonardo AI lets you generate video from a text prompt or from an existing image, using its own Motion models plus third-party engines like Veo 3.1 and Kling 3.0.
- Video generation runs on a token system — the free plan gives 150 tokens/day, enough for light experimentation but not for daily production.
- The fastest beginner path is Image2Motion: generate a still image first, then animate it with adjustable motion strength.
- Clips render up to 10 seconds, with camera controls (pan, zoom, tilt) available on newer Motion versions.
- For longer or narrative content, plan to stitch several Leonardo clips together in a simple video editor.
Table of Contents
What Is Leonardo AI, and Can It Really Make Videos?
Leonardo AI started as an AI image generator and has grown into a full creative suite owned by Canva, now covering image generation, editing, upscaling, and video. Inside the platform, video sits alongside image tools so you can move from a still to a moving clip without leaving the app.
For video specifically, Leonardo doesn’t rely on a single in-house engine. It gives you access to several state-of-the-art video models — including Veo 3.1 and Kling 3.0 — some of which can generate audio and dialogue alongside the visuals, not just silent motion.
That combination — beginner-friendly interface, multiple model choices, and image-to-video built in — is why Leonardo has become a common starting point for creators who don’t want to learn a code-heavy tool just to animate a product shot or a social clip. If you’re still comparing options, see our roundup of top AI video generators for business in 2026 for how Leonardo stacks up against the rest of the field. Full model and pricing details are also available on Leonardo AI’s official help center.
Before You Start: What You’ll Need
- A free Leonardo AI account (sign up with email or Google)
- A clear idea of the shot you want: subject, setting, and the motion you want to see
- Optionally, a reference image if you’re using image-to-video instead of text-to-video
- A few tokens saved up — video generation costs more tokens than a still image
Step 1: Create Your Leonardo AI Account
Go to leonardo.ai and sign up. The free tier issues 150 tokens per day, which resets daily but doesn’t roll over. That’s enough to test the workflow before deciding if a paid plan is worth it for regular video output.
Step 2: Decide Your Starting Point — Text or Image
Leonardo gives you two entry points into video:
- Text-to-Video — describe the scene and motion in a prompt, and the model generates the clip from scratch.
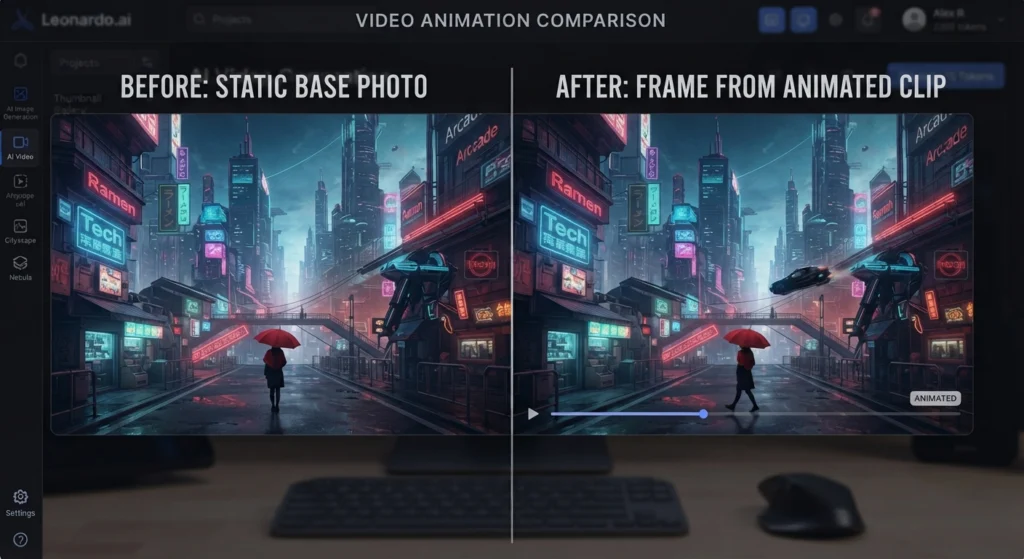
- Image-to-Video (Image2Motion) — start from a still image (one you generated in Leonardo, or one you upload) and animate it.
For beginners, image-to-video is the more forgiving option. You already know what the frame looks like before you add motion, so there are fewer variables to get wrong at once.
Step 3: Generate or Upload Your Base Image (If Using Image2Motion)
If you’re starting from an image, either:
- Generate one in Leonardo’s image tool first, refining it with prompts until the composition, lighting, and subject look right, or
- Upload an existing photo or design you already have rights to use.
Getting the still right first matters — the video model animates what’s already in the frame, it doesn’t fix composition problems for you.
Step 4: Open the Video Tool and Pick a Model
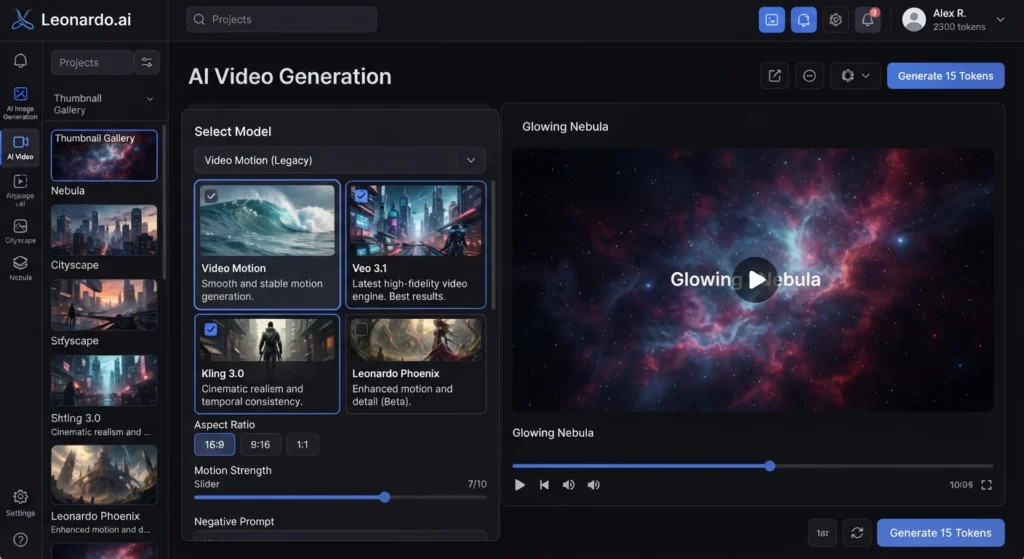
From the base image (or a blank prompt for text-to-video), open Leonardo’s Video tool. You’ll see a choice of models. Options change as new ones are added, but as of 2026 the lineup typically includes Leonardo’s own Motion engine plus licensed models like Veo 3.1, Kling 3.0, Seedance, and others.
A quick way to choose:
- Need lip-sync, dialogue, or sound effects? Pick a model that explicitly supports audio, like Veo 3.1.
- Need precise camera moves (pan, zoom, tilt)? Use Leonardo’s Motion engine, which exposes those controls directly.
- Just want quick, natural motion on a still image? Image2Motion with a mid-range model is usually fastest and cheapest.
Step 5: Write Your Motion Prompt
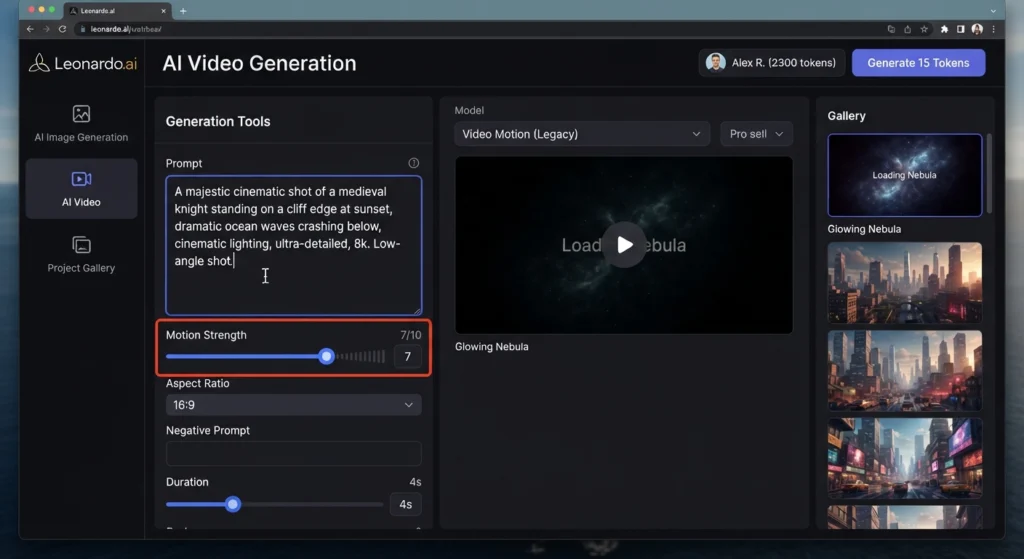
If you’re on text-to-video, your prompt needs to describe both the scene and the movement, for example: “A barista steaming milk in a bright café, steam rising, slow push-in camera shot.”
If you’re animating an existing image, focus the prompt on motion only — the subject and setting are already set by the image, so describe what should move and how much: subtle vs. dramatic, camera drift vs. static shot.
Step 6: Adjust Motion Strength and Camera Controls
Leonardo’s Image2Motion includes a motion strength slider so you can dial animation up or down — useful when a subtle sway looks more natural than an exaggerated pan. On Motion-engine generations, you can also set explicit camera direction (pan, zoom, tilt) rather than leaving it to the model to guess.
Keep motion strength lower for realistic content (product shots, portraits) and higher for stylized or abstract clips where exaggerated movement reads as intentional rather than distorted.
Step 7: Generate and Review the Clip
Hit generate. Render times vary by model and clip length — expect longer waits for higher-fidelity or audio-enabled models. Most clips top out around 10 seconds per generation.
Review for the usual AI video artifacts: warped hands or faces, inconsistent lighting between frames, or motion that clips through the edge of frame. If something’s off, regenerate with an adjusted prompt or a lower motion strength before spending tokens on a second full model swap.
Step 8: Download and Edit
Once you’re happy with a clip, download it. For anything longer than one shot — a product reel, a short story, a multi-scene ad — you’ll need to stitch several Leonardo clips together in a separate editor (CapCut, Premiere, or similar), since Leonardo generates per-clip rather than full multi-scene sequences in one pass. If you’re on a tight budget, check our guide to low-cost AI video editors for YouTubers for tools to handle that final assembly.
For the full, regularly-updated model list, Leonardo maintains a breakdown of every video model and when to use it — worth a bookmark since new engines get added often.
Leonardo AI Video: Model Comparison
| Model / Mode | Best For | Max Length | Audio Support | Camera Controls |
|---|---|---|---|---|
| Leonardo Motion (native) | Precise camera moves, brand control | ~10 sec | No | Yes (pan, zoom, tilt) |
| Veo 3.1 (via Leonardo) | Dialogue, sound effects, realism | Varies by tier | Yes | Limited |
| Kling 3.0 (via Leonardo) | Cinematic motion, complex scenes | Varies by tier | No | Limited |
| Image2Motion | Fastest beginner workflow | Short clips | No | Motion strength only |
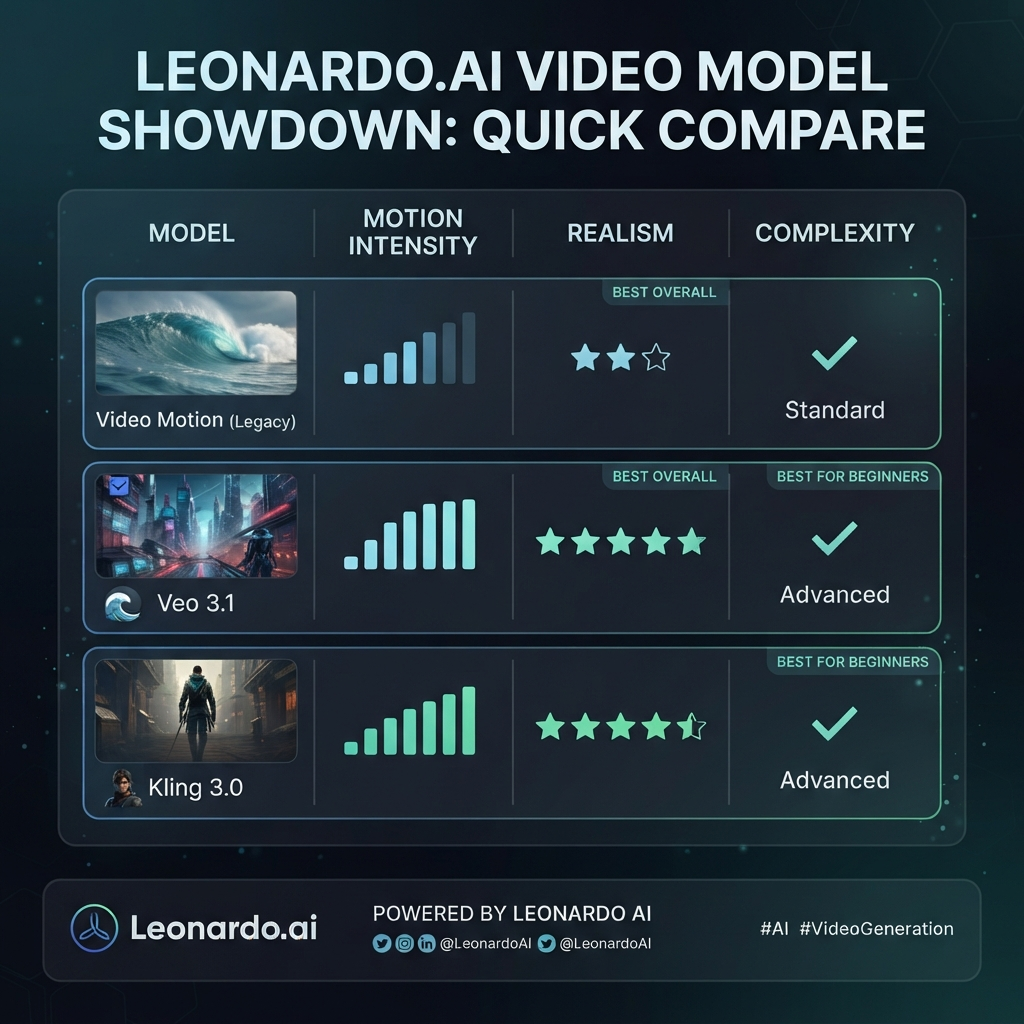
Pros and Cons of Making Videos in Leonardo AI
Pros
- One platform for image generation, editing, and video — no switching tools mid-project
- Access to multiple third-party video models instead of being locked into one engine
- Image2Motion is genuinely beginner-friendly, with minimal settings to learn
- Some models support built-in audio and dialogue generation
Cons
- Token-based pricing gets expensive fast once you move past casual testing
- No native multi-scene editor — you’ll still need an external tool for longer edits
- Clip length is capped well below what’s needed for a full ad or explainer without stitching
- Model lineup changes as licensing deals shift, so a model you rely on can be removed (as happened with Sora 2 in mid-2026)
FAQ
Is Leonardo AI free to use for video? Yes, the free plan includes 150 tokens per day, but video generation consumes tokens faster than images, so free-tier use is best for testing rather than regular production.
Do I need design or editing experience to use it? No. Image2Motion in particular is built for beginners — you pick an image, set motion strength, and generate.
Can Leonardo AI generate videos with sound? Some of its integrated models, such as Veo 3.1, can generate audio and dialogue alongside the visuals; Leonardo’s native Motion engine does not.
What’s the maximum video length? Most clips are capped around 10 seconds per generation. For longer content, generate multiple clips and combine them in a video editor.
Is Leonardo AI better than Runway or Pika for beginners? Leonardo’s advantage is having several video models in one place alongside image tools, which suits beginners who don’t want to manage separate accounts. Dedicated tools like Runway may offer deeper editing control for advanced users.